Tensiometer winner
December 1, 2022
Congratulations to Tomi Biloglav of Sweden — you are the winner!
Congratulations to Tomi Biloglav of Sweden — you are the winner!
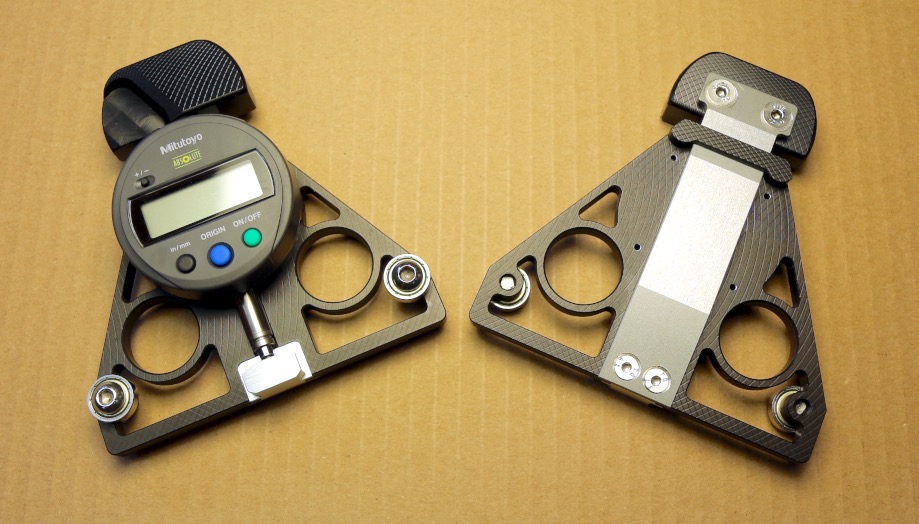
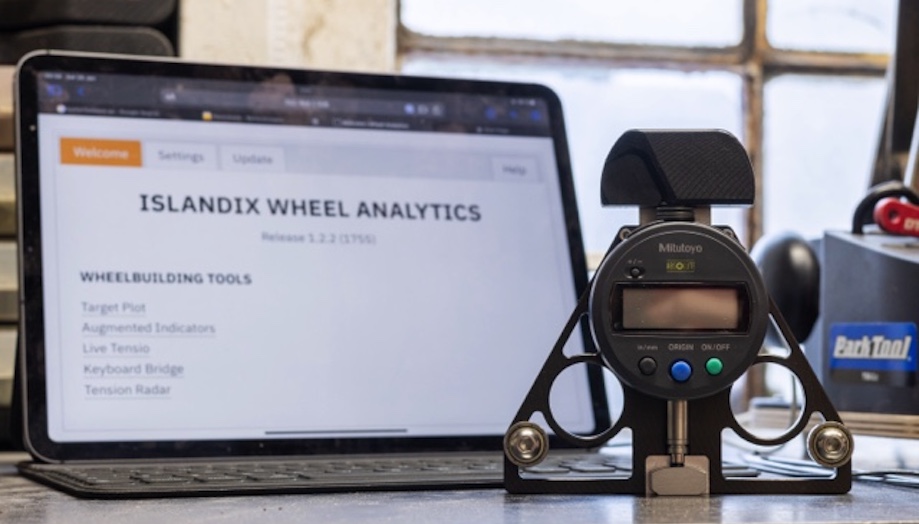
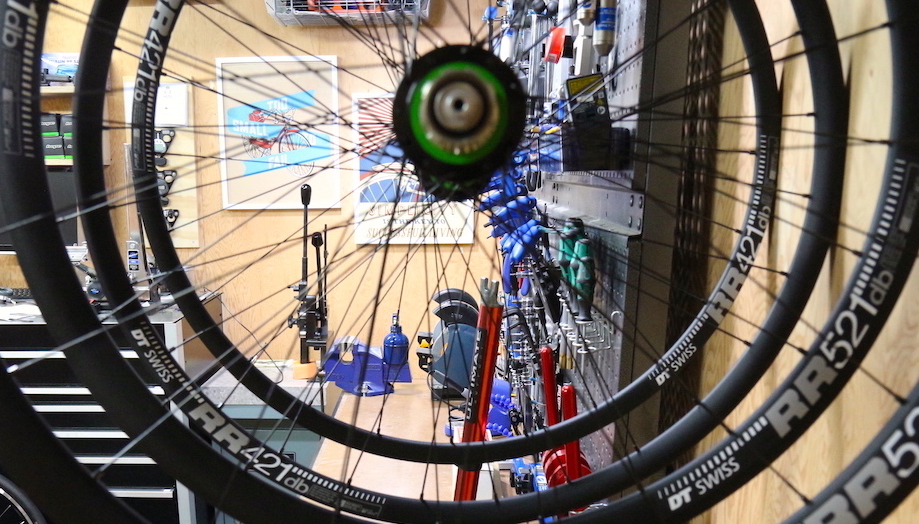
Check out this futuristic implementation of the Jobst Brandt tensiometer. We prefer this design for its insensitivity to distortion from the technician’s hand. Its symmetrical layout makes it equally natural to use left or right. Simple operation with highly repeatable results.
This tool is a limited edition, more than a year in the making. Machined to tight tolerances and finished beautifully. The tensio is equipped with the same Mitutoyo indicator we trust for truing and a specially relieved handle to accommodate the data cable. Each tool is individually calibrated.
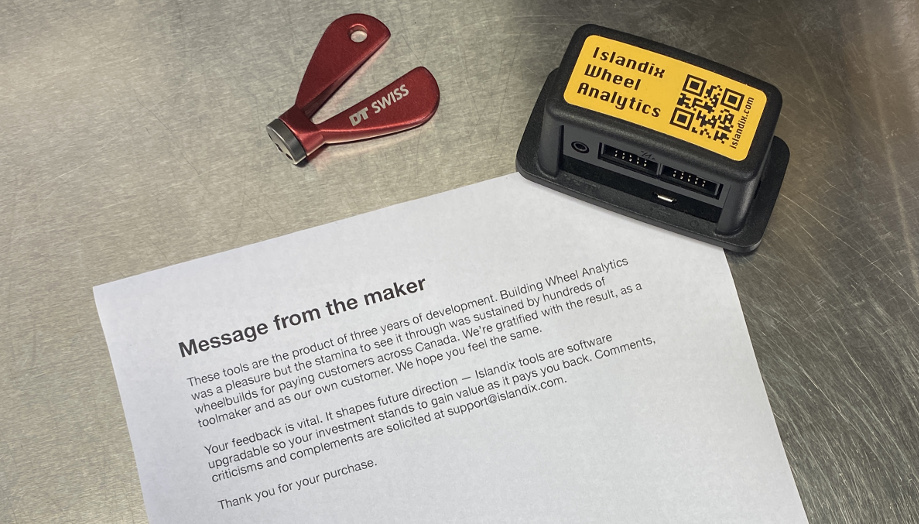
How do you buy one? Unfortunately they sold out before being posted online (join the Islandix mailing list to get in on these deals). There’s hope — one tool has been held back and will be awarded to a Wheel Analytics owner by random draw. There are two ways to enter:
Draw to take place December 1, 2022 or as soon as practical thereafter. The winner agrees their name may be publically disclosed. Tensiometer to be picked up in Victoria, British Columbia or posted at the winner’s expense (postage only, can be marked as a gift for customs purposes but carries a declared value of $599). Prize includes no warranty and has no cash equivalent. Order today to enter!
A fireside story from my wheelbuilding career:
A customer brought in a brand new set of wheels. He purchased them online, a nice deal, but they arrived with insufficient spoke tension including one slack spoke. He didn’t feel safe riding them, which was the right instinct. The job was simple — finishing an incomplete wheelbuild. I provided before-and-after tension graphs and the online seller sheepishly reimbursed the customer.
What changes for your shop when you become a team of wheelbuilders? Does quality depend on who pulls the ticket? Do you talk about quality out loud? Write it down? Do you enforce quality standards? How do you keep quality high when there are changes in the team?
Wheel Analytics can help. Decide what constitutes a properly true wheel in your shop. Configure it in Wheel Analytics and your benchmark will be visible to staff as they work. The line between in-progress and complete is clearly defined. Tension too — for the low price of visiting each spoke with a connected tensiometer, Wheel Analytics calculates average tension and tension variance. Use this information to prevent spoke breakage from undertension, rim damage from overtension and re-truing comebacks from unbalanced tension.
It’s just as likely you have the opposite problem since most wheels can be made better with more effort. Some team members need to be told when to stop and defining standards puts a ceiling on how much to invest in one wheel. Move to the next ticket efficiently without second guessing.
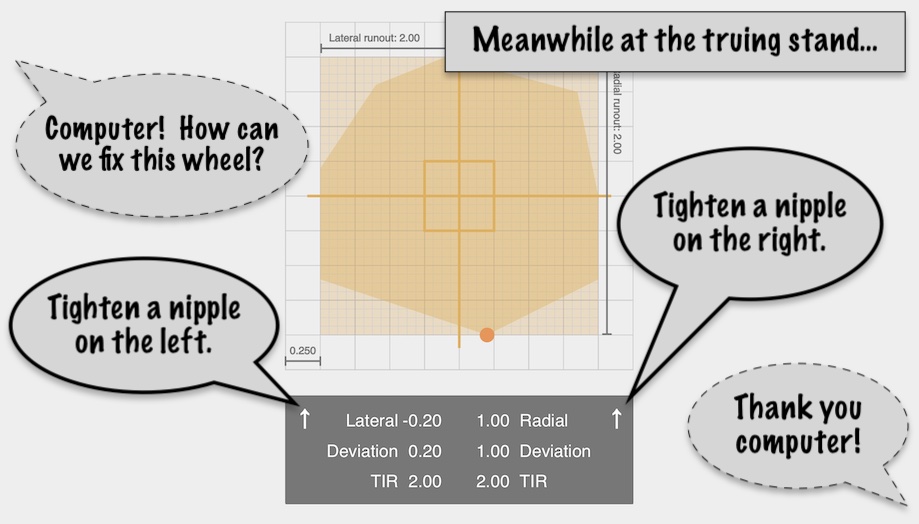
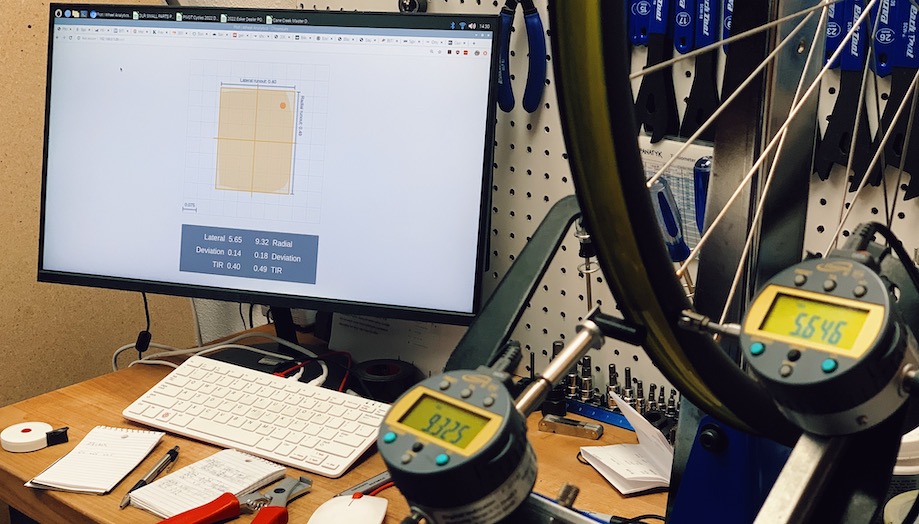
The Target Plot is a visualization that combines lateral and radial alignment in one view. That’s useful because it helps us reason about wheels in a smarter way compared to dealing with one dimension at a time. For example fixing lateral alignment may help or hurt radial alignment as a side effect. We can increase efficiency by preferring adjustments with helpful side effects and mitigating harmful ones as they happen.
To steer wheelbuilders in this direction there’s an AI function that relates the visualization to steps required to improve the wheel. How does it work?

This week Islandix reached a new milestone. After six patches, Wheel Analytics has graduated to version 1.1. We’re happy with the software and gratified by your feedback.
The 1.1 series will continue this work, adding one new visualization. As thanks for your support Islandix welcomes all existing customers to this series without charge. It’s available now through the Update tab on your Wheel Analytics tool. For everyone else, Wheel Analytics is in stock.
Starting with 1.1.1, the tool is capable of checking for software updates automatically. Enable this feature by selecting Check for updates on the Settings tab. When an update becomes available, a banner is presented on the main screen — download and install with a single click.
Wheel Analytics is a kit for adding visualization to your truing stand. It looks a little different from one installation to the next as each workbench has its own character.
The photo above is the workbench at Eastern Wheelworks, a shop owned and operated by Sean Lerner in La Grande, Oregon. Sean is a specialist offering wheelbuilds and suspension service in house. At Eastern you’ll get service advice from the same person who turns the wrenches, which is a model worth supporting.
A setup like his gets you into visualization for the smallest investment.
Sean took Wheel Analytics without indicators, opting to source his own from iGaging. He transferred the tips from his Park Tool analog indicators, saving quite a few dollars for a few minutes’ work. Since a pair of iGaging indicators can be had for as little as $140 USD, this is a cost-effective setup. If I could offer a deal like that without losing my shirt, I certainly would.
Sean bought a new computer for his wheelbuilding bench. He’s using the Raspberry Pi 400, a tiny all-in-one system that retails for $100 and offers plenty of power for fronting Wheel Analytics. That price includes everything — keyboard, mouse, power, storage, wireless and operating system — everything minus the monitor. Any monitor will work and Sean has chosen a large one. Large screens are great because they let you absorb visualizations without losing sight of the wheel. You can mount the display further away without sacrificing legibility.
What follows is a retrospective on the first anniversary transistor truing. How we got here, how it’s going and next steps.
This is a quick demo of Live Tensio. With no extra effort you get primary metrics for tension range and balance. Control by foot pedal means the relationship between your hands and the wheel is unchanged.
This is Live Tensio, part of Islandix Wheel Analytics. In version 1.0.6 Live Tensio gets a performance upgrade. Here I’m surveying wheel tension to decide what services should be recommended to the owner. I’m working quickly so the screen moves fast. The top area shows live tension as I work my way around the wheel. Values are displayed in kilograms but it works in Newtons too. Each time I tap the left foot pedal, it records the current reading for the left side of the wheel. Live Tensio automatically calculates min, max and average tension as I go. The distribution of tension values is visualized in a bar graph for each side of the wheel. Each horizontal tick represents 5% deviation. Use the graph to recall tension for any given spoke. Hover with the mouse or tap a touchscreen for more information. It turns out this wheel’s in rough shape and the customer will need a re-tensioning service.
Transcription of video
Update: the user interface in this demo has been revised considerably.
Wheel Analytics doesn’t check for software updates so you might not know what you’re missing. The WA-1 doesn’t connect to the internet at all but perhaps worth a rethink in this case.
Software version 1.0.5 was released this week. There are a few improvements but a couple worth mentioning. Truing visualizations now zoom to use available screen space automatically. Bigger is better. And all visualizations have improved printable versions for saving or sharing. This is a free update available via the Update tab on your Wheel Analytics tool.
Did you know the Wheel Analytics manual is available online? The first half covers installation and configuration. The second half is all about wheelbuilding with color diagrams that unpack each visualization in detail. Feedback is welcomed on documentation just as much as on the tools themselves. Please email if you have any comments or questions.