True from the joint

If you true bicycle wheels using indicators, dial or digital, you’ll know the joint area can be problematic on some rims. A little twist or bump can wreak havoc, sending your instrument to the moon if only for a moment. It’s possible to work around this problem.

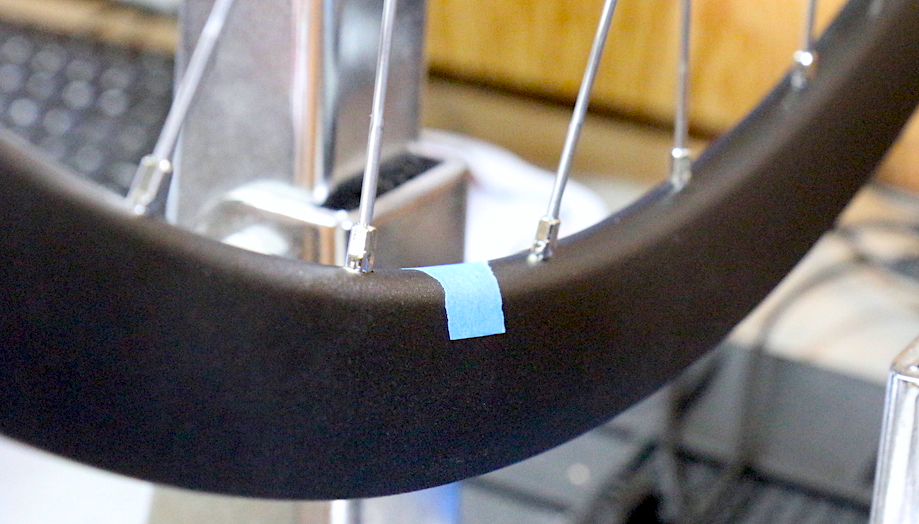
Normally truing is oriented from the valve hole, starting at the valve hole and continuing around the wheel until returning to the valve hole again. It’s nothing special other than being a signpost to indicate you’ve covered the whole wheel. Instead start at the joint. Begin scanning immediately after the joint and continue around the wheel until returning to the point immediately before the joint. This factors out hyperlocal distortion at the seam. If you need to make the joint more conspicuous, apply a little piece of masking tape to establish your own signpost.

A bit less black

Here’s few shots of a wheelset built earlier this month. This theme of black hubs, black rims, silver spokes and silver nipples is becoming more common. Looks pretty good from here.

Truing stand beta

I’ve been developing my truing stand for quite a while now. The software has been stable for more than a year but recent changes make it sing. After a few hardware revisions, that part is solid too. For a peek at both check out the video below.

(For communication purposes the “wheels” in the screencast part of the video are simulated. I have a simulation driver for testing the user interface, which lets me try wheels far worse than I encounter in the workshop. No wheels were harmed in the design of this system.)

Checking rims

I have a prebuild ritual that involves quite a lot of inspection. It’s a simple process — I look over everything deliberately and see if anything stands out. I’ll pay attention to the rim stickers and hub branding so their orientations can be chosen deliberately.

On alloy rims I like to visit every spoke hole with a chamfer tool or a handheld drill bit. This puts a subtle profile in the hole where the head of the nipple rests. Sometimes there can be a coil of drilling chaff attached to a spoke hole — a chamfering pass breaks them off and smooths any burrs. When I visit the joint I look at the internal sleeve, if any. Does it interfere with nipple fit?

Measuring is inspection

Measuring your own ERD can indicate a lot. Use the measuring step to dry fit washers if using them. Do the washers sit nicely in the rim? Measuring will tell you if your rim is round or oval. All else being equal the rounder the rim, the better the result in terms of alignment and tension balance. If your rim is oval, expect to spend a little longer at the bench to reach perfection. Have you ever found a job difficult and doubted your skills? It could be the rim.

Morizumi mounting

Ric from Wheel Fanatyk visited recently and wrote about it on his blog. He was interested in my Morizumi setup and maybe others will be too. I’ll leave a few notes and build photos here.

I started with a King stand for big drills or small mills. A few considerations led to this choice: not too heavy to move alone but heavy enough to resist tilting under use; not too expensive; and available locally. The same stand is sold under different names in different markets so searching by keyword may be helpful if you’re looking.

The default option would be to mount a spoke machine directly to the stand but that would be low for me especially with my thick anti-fatigue mat in front of the tool. I took a sheet of leftover pine, chopped it on the table saw and laminated pieces together to create a top with my desired lift. I took advantage of the laminated construction to insert T-nuts between layers — I matched them to existing holes in the stand letting me attach the top with bolts from inside. Having no exterior hardware makes the top an uninterrupted flat surface, which is helpful in terms of oil containment.

By mounting my spoke machine to the wooden top I only needed to drill one hole in the metal stand — for the spoke offcut chute. If you’re a casual cutter this step might be unnecessary but it’s important for a production shop. I bolted my spoke machine in place and traced exactly where the chute would go. I cut the chute in the wooden top, mounted it, and used the top itself as a drilling guide. The result: spoke scraps fall through the chute landing in a bucket accessed through the main door.

Cutting oil is critical but I didn’t want to fix a drip tray under the machine. To protect the wood I wrapped it with Formica countertop laminate. The process involves gluing pieces with contact cement and trimming the edges with a router. Formica is oil tolerant and lets me wipe away drips without hurting anything. In order to prevent oil from seeping beneath the spoke machine and draining through its attachment points, I put a bead of sealant around the spoke machine on its final installation.

Building as always

Wheelbuilds continue to trickle through the shop. Here’s a few snaps of recent builds:

Paul track build

This wheelset uses Paul Component track hubs laced to Stan’s Alpha 400 tubeless rims with Sapim Laser spokes and alloy nipples. Total weight is 1545g. Additionally this wheelset is getting tamper-proof torx bolts for a little extra lockup security. The bolts are a Paul upgrade option.

Spoke rulers

I own a few spoke rulers. You’d think they’re all the same and mostly they are.

My daily driver is the Sapim ruler at the far left — it does its job very well. It also tries to be a spoke diameter gauge but isn’t as successful. The purple Pi ruler, next in line, is pretty novel with its center channel for aligning the spoke. This helps measuring used spokes, which are never straight. I like that it’s marked in half millimetre increments although the bright finish detracts from legibility. The Phil Wood ruler is heavy in a good way and pleasing to use. It has the best spoke diameter gauge although 2.2mm is conspicuously missing. The Cyclus and Park Tool rulers are similar, however Cyclus gets extra marks for putting its graduations on the spoke path. The VAR ruler is similar but adds nipple measurement, which is clever and useful. The DT Swiss ruler doesn’t feel like a real tool. The Unior ruler is on the same level as Park, which means good enough. The Filzer tool on the end is conspicuously similar to the Unior tool — since Filzer is a marketing company we can probably guess who made their tool.

Recent DT Swiss builds

In the last little while I’ve done a couple wheelsets using DT Swiss hubs and rims. Both sets use DT 350 hubs; one rider selected R470db rims while the other chose RR521db rims. If you’re thinking about building a set of wheels yourself, I can testify these rims make the work painless.

Silver revival

Pictured below are two wheelsets built with 650b Pacenti Brevet rims, one built in March and another more recently. I was happy with the steadiness of the rims and would recommend them if they meet your needs. The first set uses Campagnolo hubs; SON and Shimano hubs on the second.

Archives

FEEDS